

面试时总被问,spring中使用了哪些设计模式,你在实际开发中又使用哪些设计模式。给他手指一个方向跟他说,这就是一个模式:go out!。
这就是一种模式:策略模式,一个接口的多个实现方式(算法)。本文梳理了使用springboot实现的三种实现策略模式的应用
我们知道,springboot应用初始化的过程是通过事件机制进行的。主要是通过 EventPublishingRunListener 在不同的初始化阶段发送不同的 SpringApplicationEvent (不同的子)事件,触发相应逻辑(这里的逻辑指class的加载)的加载和初始化。
当 ApplicationPreparedEvent 事件发送后,对于应用来讲,说明整个初始化过程已完成,也意味着所有的类已放入spring ioc 中。
这时我们就可以结合自己的业务逻辑实现策略模式的应用,我们通过以下三种方式实现策略的应用
方式一:使用ApplicationListener 和 ContextRefreshedEvent
核心使用的是 ApplicationContext.getBeanNamesForAnnotation(Class annotationType)方法,基于注解类,获取标有指定注解类的所有实例
我们的业务逻辑是这样的:应用Api接收规则参数(authType),Api 根据authType 值的不同,使用不同的auth service,执行相应的规则业务逻辑。1
2
3
4
5
6
7
8
9
10
11
12
13
14
15
16
17
18
19
20
21
22
23
24
25
26
27
28
29
30
31
32
33
34
35
36
37
38
39
40
41
42
43
44
45
46
47
48
49
50
51
52
53
54
55
56
57
58
59
60
61
62
63
64public interface UserValidator<D, R> {
String check(D data, R rule);œ
}
@Service
@Validator(authType = AuthType.B_USER)
public class BUserValidator implements UserValidator<String, String> {
@Override
public String check(String data, String rule) {
System.out.println("客官,这里B端用户逻辑");
return "";
}
}
@Service
@Validator(authType = AuthType.C_USER)
public class CUserValidator implements UserValidator<String, String> {
@Override
public String check(String data, String rule) {
System.out.println("客官,这里C端用户逻辑");
return "";
}
}
public enum AuthType {
B_USER(1, "b端用户"),
C_USER(2, "c端用户");
public final int type;
public final String code;
AuthType(int type, String code) {
this.type = type;
this.code = code;
}
}
@Target(ElementType.TYPE)
@Retention(RetentionPolicy.RUNTIME)
@Documented
@Component
@Inherited
public @interface Validator {
AuthType authType();
}
@Component
public class AuthContainer implements ApplicationListener<ContextRefreshedEvent> {
private ConcurrentHashMap<Integer, UserValidator> validatorMap = new ConcurrentHashMap<>();
@Override
public void onApplicationEvent(ContextRefreshedEvent contextRefreshedEvent) {
String[] names = context.getBeanNamesForAnnotation(Validator.class);
if (names.length > 0) {
for (String name : names) {
System.out.println("UserValidator:" + name);
UserValidator userValidator = context.getBean(name, UserValidator.class);
Validator validator = userValidator.getClass().getAnnotation(Validator.class);
validatorMap.put(validator.authType().type, userValidator);
}
}
}
public ConcurrentHashMap<Integer, UserValidator> getValidatorMap() {
return validatorMap;
}
}
Api 接口定义如下,根据不同的authType 值,执行不同的auth service
1 | @RequestMapping("/client_auth") |
方式二:使用ApplicationContextAware 和 @PostConstruct
我们的业务逻辑是这样的:应用Api接收规则参数(ruleType),Api 根据ruleType 值的不同,使用不同的rule service,执行相应的规则业务逻辑。
核心使用的是 ApplicationContext.getBeanNamesForAnnotation(Class annotationType)方法,基于注解类,获取标有指定注解类的所有实例
代码结构:

核心代码如下:1
2
3
4
5
6
7
8
9
10
11
12
13
14
15
16
17
18
19
20
21
22
23
24
25
26
27
28
29
30
31
32
33
34
35
36
37
38
39
40
41
42
43
44
45
46
47
48
49
50
51
52
53
54
55
56
57
58
59
60
61
62
63
64
65
66
67
68
69
70
71public abstract class RuleValidator<D, R> {
public abstract String check(D data, R rule);
}
@RuleMapping(ruleCodeEnum = RuleCodeEnum.COUNT)
@Service
public class CountRuleValidator extends RuleValidator<String, String> {
@Override
public String check(String data, String rule) {
System.out.println("客官,这里是数量规则区域");
return "";
}
}
@RuleMapping(ruleCodeEnum = RuleCodeEnum.PRICE)
@Service
public class PriceRuleValidator extends RuleValidator<String, String> {
@Override
public String check(String data, String rule) {
System.out.println("客官,这里是价格规则区域");
return "";
}
}
public enum RuleCodeEnum {
/** 价格规则 */
PRICE(1, "price"),
/** 数量规则 */
COUNT(2, "count");
public final int type;
public final String code;
RuleCodeEnum(int type, String code) {
this.type = type;
this.code = code;
}
}
@Target(ElementType.TYPE)
@Retention(RetentionPolicy.RUNTIME)
@Documented
@Component
@Inherited
public @interface RuleMapping {
String ruleCode() default "";
String ruleDesc() default "";
RuleCodeEnum ruleCodeEnum();
}
@Component
public class RuleValidatorInit implements ApplicationContextAware {
private static ApplicationContext context;
private Map<Integer, RuleValidator> validatorMap = new HashMap<>();
@Override
public void setApplicationContext(ApplicationContext applicationContext) throws BeansException {
this.context = applicationContext;
}
public Map<Integer, RuleValidator> getValidatorMap() {
return validatorMap;
}
@PostConstruct
public void afterPropertiesSet() {
String[] names = context.getBeanNamesForAnnotation(RuleMapping.class);
if (names.length > 0) {
for (String name : names) {
RuleValidator ruleValidator = context.getBean(name, RuleValidator.class);
RuleMapping ruleMapping = ruleValidator.getClass().getAnnotation(RuleMapping.class);
validatorMap.put(ruleMapping.ruleCodeEnum().type, ruleValidator);
}
}
}
}
Api 接口定义如下,根据不同的ruleType 值,执行不同的rule service1
2
3
4
5
6
7
8
9
10
11
12
13
14
15@RequestMapping("/client")
@RestController
public class Client {
@Autowired
private RuleValidatorInit ruleValidatorInit;
@RequestMapping("getRule")
public String getRule(@RequestParam("ruleType") Integer ruleType) {
Map<Integer, RuleValidator> map = ruleValidatorInit.getValidatorMap();
System.out.println(map);
RuleValidator<String, String> ruleValidator = map.get(ruleType);
String res = ruleValidator.check("hi", "看看什么规则");
return res;
}
}
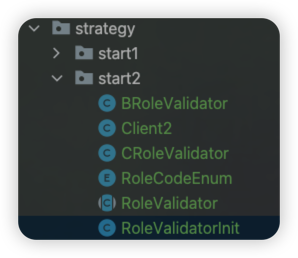
方式三:使用ApplicationContextAware
对比方式一,这里不需要定义指定注解了
核心使用的是 ApplicationContext.getBeansOfType(classType)方法,获取接口 classType 的所有子类实例
代码结构:
核心代码如下:1
2
3
4
5
6
7
8
9
10
11
12
13
14
15
16
17
18
19
20
21
22
23
24
25
26
27
28
29
30
31
32
33
34
35
36
37
38
39
40
41
42
43
44
45
46
47
48
49
50
51
52
53
54public interface RoleValidator<D, R> {
String check(D data, R rule);
RoleCodeEnum source();
}
@Service
public class BRoleValidator implements RoleValidator<String, String> {
@Override
public String check(String data, String rule) {
System.out.println("客官,这里B端用户逻辑");
return "";
}
@Override
public RoleCodeEnum source() {
return RoleCodeEnum.B_USER;
}
}
@Service
public class CRoleValidator implements RoleValidator<String, String> {
@Override
public String check(String data, String rule) {
System.out.println("客官,这里C端用户逻辑");
return "";
}
@Override
public RoleCodeEnum source() {
return RoleCodeEnum.C_USER;
}
}
public enum RoleCodeEnum {
B_USER(1, "b端用户"),
C_USER(2, "c端用户");
public final int type;
public final String code;
RoleCodeEnum(int type, String code) {
this.type = type;
this.code = code;
}
}
@Component
public class RoleValidatorInit implements ApplicationContextAware {
private static Map<RoleCodeEnum, RoleValidator> builderMap = new HashMap<>();
@Override
public void setApplicationContext(ApplicationContext applicationContext) throws BeansException {
for (RoleValidator roleValidator : applicationContext.getBeansOfType(RoleValidator.class).values()) {
builderMap.put(roleValidator.source(), roleValidator);
}
}
public static RoleValidator getRoleValidator(RoleCodeEnum role) {
return builderMap.get(role);
}
}
Api 接口定义如下,根据不同的roleType 值,执行不同的role service
1 | @RequestMapping("/client_role") |
总结
通过三种方式的对比,对于核心部分,其实就是几行代码的不同。无论是利用 Event 事件还是通过 Aware,本质都是拿到或利用 ApplicationContext 去解析接口,拿到实现类的实例,放入集合,然后在客户端(或其他)获取集合,根据枚举标识拿到对应的子类,执行对应的业务逻辑。

